
How to make homemade cat litter cheap usually comes down to two things: choosing the right base material for your cat’s habits, and setting it up so it controls odor without turning into a sticky mess.
If you’re paying premium prices for clay or “natural” bags, DIY can feel tempting, but a lot of people quit after one bad batch that tracks everywhere or smells by day two. The good news is you can get workable results with common household items, as long as you pick a recipe that matches your cat and your home.
This guide breaks down why DIY litter works in some homes and fails in others, gives a quick self-check so you don’t waste time, and then walks through a few low-cost mixes with clear “when to use it” notes. You’ll also see safety flags, because cats can be picky and, in some cases, sensitive to dust or scents.
What “cheap” homemade litter actually means (and what it doesn’t)
Cheap isn’t just the lowest price per pound. In real life, it’s cost per week of a box that stays usable, plus how much cleanup time you can tolerate.
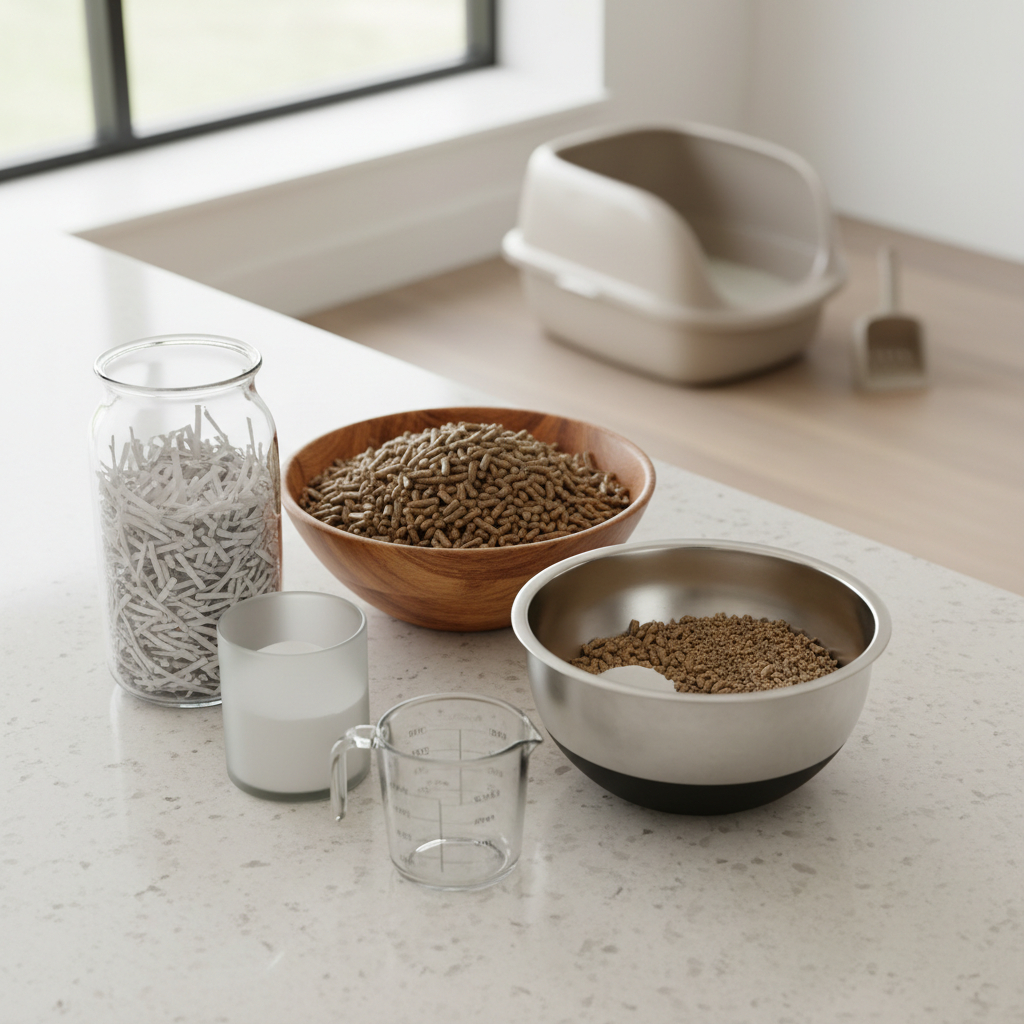
- Lowest material cost: shredded paper/cardboard, or a paper-and-baking-soda mix.
- Best value for odor control: wood pellets (often sold as pellet fuel or bedding), usually still inexpensive.
- Hardest part to replace cheaply: strong clumping. Many DIY options absorb well but don’t clump like bentonite clay.
If your priority is tight clumps and minimal scooping time, you might still prefer a budget commercial litter. DIY tends to shine when you want lower spend, less fragrance, or easier sourcing.
Why DIY litter sometimes smells worse: common causes
When people say homemade litter “doesn’t work,” it’s often not the recipe, it’s the setup. A few patterns show up again and again.
- Too little absorbency for your cat’s output: Some cats pee a lot, and paper-only mixes get overwhelmed fast.
- Box depth is wrong: Shallow layers saturate quickly; overly deep layers hide waste and trap moisture.
- No odor buffer: Baking soda can help, but it needs the right amount and regular stirring.
- Skipping full change-outs: Even great DIY litter usually needs more frequent full refresh than premium clumping clay.
According to the American Veterinary Medical Association (AVMA), good litter box hygiene matters for both pets and people, so treat odor as a signal to clean sooner rather than something to mask with heavy fragrance.
Quick self-check: which homemade litter option fits your home?
Before you start, answer these honestly. It saves money because you avoid making a batch your cat rejects.
- Does your cat refuse changes easily? If yes, plan a slow transition and pick a texture close to current litter (fine paper crumble beats chunky pellets for some cats).
- Do you need clumping? If you rely on clumps for quick scooping, choose wood pellets (sift method) or consider mixing DIY with a small amount of commercial clumping litter.
- Is dust an issue? Some cats and people react to dust; pellets and dampened paper tend to be lower-dust than dried paper crumble.
- Do you have composting or trash limits? Disposal options affect what “cheap” looks like week to week.
If you’re dealing with persistent avoidance, urinating outside the box, or sudden behavior change, it may be worth checking with a vet, since medical issues can look like “litter problems.”
Recipe options (cheap, practical) with a simple comparison table
Below are three DIY approaches people typically try in the U.S. None is perfect for every cat, but each can be “good enough” when matched to the right situation.
DIY litter comparison
| Option | Best for | Odor control | Clumping | Tracking |
|---|---|---|---|---|
| Shredded paper + baking soda | Lowest cost, easy sourcing | Fair (needs frequent refresh) | Low | Medium |
| Wood pellets (sift method) | Odor control, low dust | Good | No clumps, but breaks down | Low to medium |
| Paper pulp (soaked + dried) | Better absorption than dry paper | Fair to good | Low | Medium |
Many households end up using a hybrid: mostly DIY with a small “top layer” of commercial litter for familiarity and easier scooping. It’s not purist, but it often keeps cats happier.
How to make homemade cat litter: 3 low-cost methods
You can keep this simple. Pick one method and run a one-week test with one box, rather than converting every box on day one.
1) Shredded paper + baking soda (fastest, cheapest)
This is the “I need something today” option. It absorbs, it’s soft under paws, but it needs more maintenance.
- Materials: non-glossy paper or cardboard, baking soda, a large bin or bag for shredding
- How to do it:
- Shred paper into small strips, then crumple lightly so it isn’t flat.
- Fill the box 2–3 inches deep.
- Sprinkle a light layer of baking soda through the mix, then stir with the scoop.
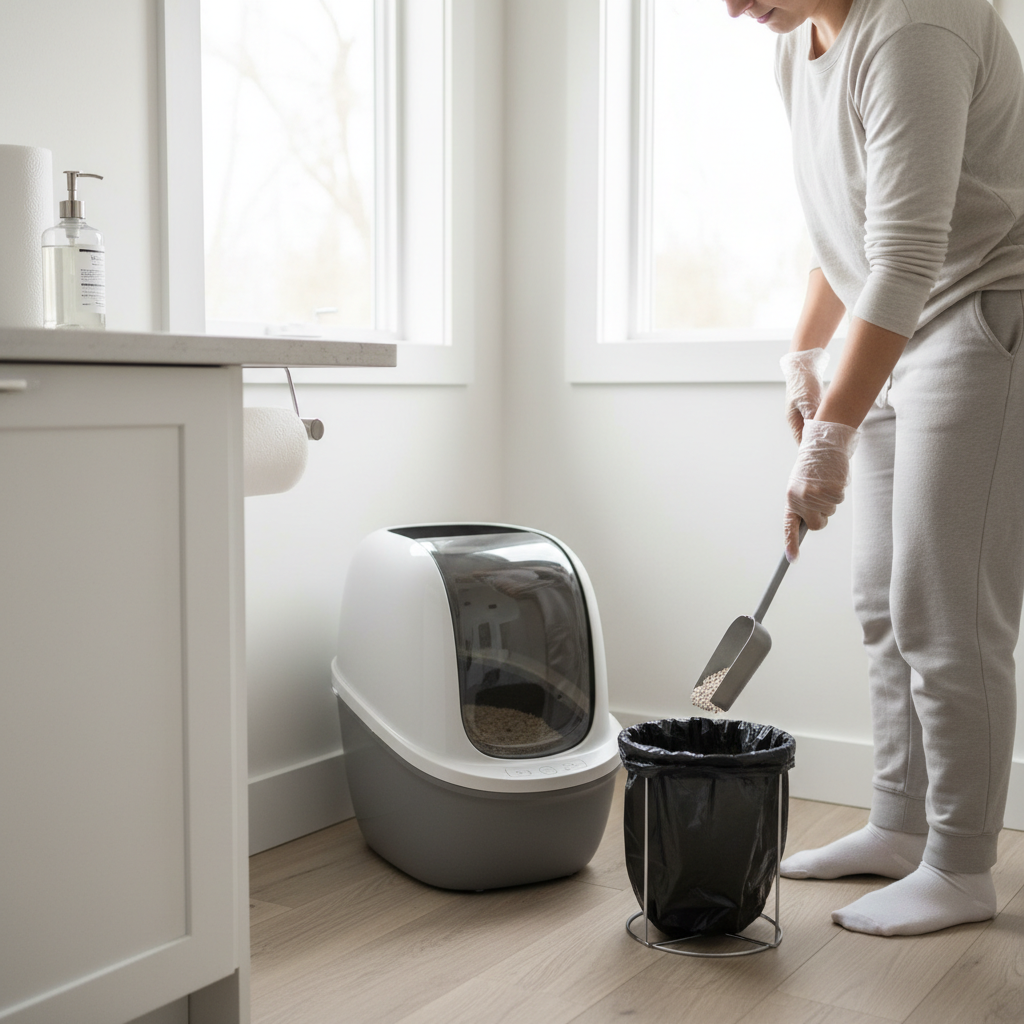
- Maintenance: scoop solids daily, stir once a day, full change-out every few days in many homes.
Tip that saves money: if odor rises fast, don’t keep adding baking soda endlessly. It’s usually cheaper to dump and refresh than to “fight” a saturated batch.
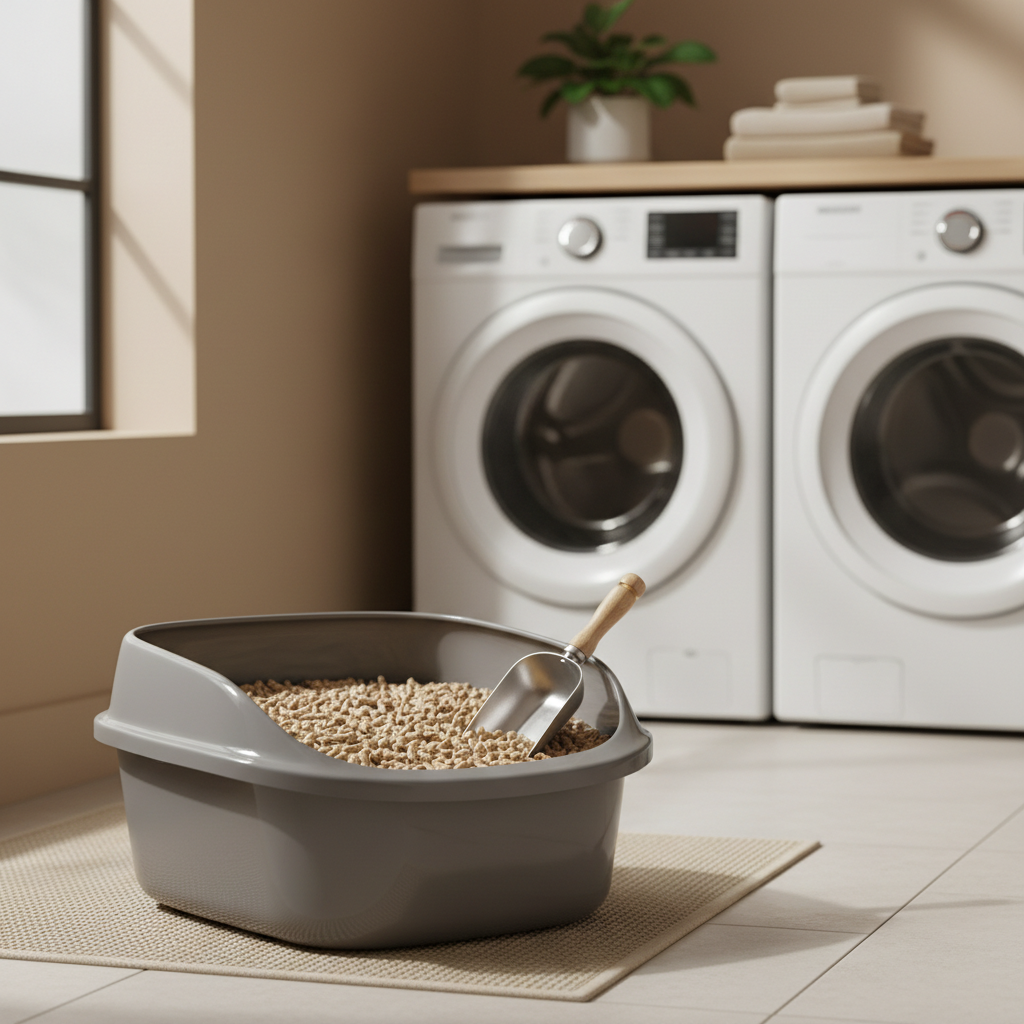
2) Wood pellets (best odor value, different scooping style)
Pellets don’t clump like clay. They absorb urine, then break into sawdust. You remove solids daily, and sift out the sawdust regularly.
- Materials: plain wood pellets (no additives), sifting litter box or a scoop that separates fines
- How to do it:
- Add a 1.5–2 inch layer of pellets.
- Scoop poop daily.
- Every 1–3 days, sift out sawdust and top up with fresh pellets.
Safety note: choose pellets intended for animal bedding or clearly labeled as additive-free. Some pellet fuel products can contain binding agents or softwoods; if you’re unsure, skip that bag.
3) Paper pulp litter (more work upfront, better absorption)
This version tries to solve the “paper gets soggy” problem by turning paper into a more granular, absorbent texture.
- Materials: non-glossy paper, warm water, baking soda (optional), strainer, drying surface
- How to do it:
- Soak shredded paper until it becomes pulp, then drain well.
- Press out as much water as possible, mix in a small amount of baking soda if you want odor buffering.
- Break into small chunks and dry fully before using, damp litter can mildew.
If you live in a humid area, drying can be annoying, and the whole “cheap” promise can disappear because you’re spending time and space on it.
Setup and maintenance: the part that actually keeps it cheap
The recipe matters, but the routine matters more. If you want the homemade option to stay budget-friendly, focus on these habits.
- Use the right depth: about 2–3 inches is a practical starting point for most DIY bases.
- Keep one extra liner or spare box: swapping boxes quickly makes full refresh less of a chore.
- Stir, don’t just scoop: with paper mixes, stirring distributes moisture and slows odor buildup.
- Ventilation beats fragrance: avoid strong scents; a cleaner box usually works better than perfume.
According to the Centers for Disease Control and Prevention (CDC), handling cat waste calls for basic hygiene like washing hands after cleaning and avoiding contact with feces, especially for people who may be pregnant or immunocompromised.
Mistakes that make cats reject homemade litter (and how to avoid them)
If your cat votes “no,” it’s often about texture, smell, or box cleanliness, not stubbornness.
- Switching overnight: mix in the new material over 7–14 days, especially for sensitive cats.
- Using scented additives: essential oils and strong deodorizers can be irritating, and some can be unsafe for cats, so it’s usually better to avoid them.
- Letting it stay damp: wet paper pulp or saturated paper strips can sour quickly, which makes the box unappealing.
- Overfilling the box: deep loose material can feel unstable under paws, and it increases tracking.
If you’re trying to figure out how to make homemade cat litter work long term, treat cat acceptance as the main metric. Saving a few dollars is not worth a cat that starts eliminating elsewhere.
When to stop DIY and get help
DIY litter is a household hack, not a medical solution. If any of these show up, it’s smart to pause experiments and ask a professional.
- Your cat strains to urinate, cries, or urinates very frequently.
- There is blood in urine or stool, or a strong sudden change in odor.
- A normally reliable cat begins peeing outside the box after a litter change.
Those signs can have multiple causes, and a veterinarian can help you rule out issues that a litter tweak will not fix.
Key takeaways (so you can decide today)
- Wood pellets often offer the best balance of cost and odor control, but you scoop differently.
- Paper-based mixes can be very cheap, but they usually need more frequent full refresh.
- Transition slowly if your cat dislikes change, and keep one “safe” box during the test.
- Skip heavy scents; cleanliness and airflow beat perfume in many homes.
Conclusion: a cheap homemade litter that your cat will actually use
If your goal is to spend less without constant frustration, start with wood pellets for one box and run it for a week, then adjust based on odor, tracking, and your cat’s comfort. If pellets aren’t a fit, paper plus baking soda can still work as an emergency or ultra-budget option, just plan for more frequent refreshes.
If you want a simple next step, choose one recipe above, set a realistic cleaning schedule, and watch your cat’s behavior closely, that feedback matters more than any “perfect” DIY formula.
FAQ
Is homemade cat litter safe for cats?
Many homemade options can be safe when you use clean, non-toxic materials and keep the box dry and sanitary. If your cat has respiratory sensitivity, lower-dust options like plain wood pellets may be easier, and for any ongoing issues, a vet can advise.
How often should I change homemade cat litter?
It depends on the material and how many cats use the box. Paper mixes often need a full change every few days in many households, while pellet systems can go longer with regular sifting and top-ups.
Does baking soda work for litter box odor?
Baking soda can help buffer odors, but it won’t “fix” a saturated box. If smell returns quickly, you usually need a full refresh and better daily stirring or sifting.
Can I use sand or dirt as cat litter?
Some people try it, but sand and dirt can track heavily and may carry contaminants depending on the source. If you consider this route, think about hygiene and disposal first, and avoid anything that could contain chemicals.
What’s the cheapest way to make clumping cat litter at home?
True clumping is hard to replicate cheaply with common household materials. A practical compromise is using mostly DIY litter with a small amount of commercial clumping litter mixed in, as long as your cat accepts it.
Why is my cat peeing outside the box after I changed litter?
Texture and scent changes can trigger avoidance, but so can stress or medical problems. If the timing is right after a switch, go back to a familiar litter and transition more slowly, and if it continues, consider calling a vet.
Will wood pellets hurt my cat’s paws?
Some cats adjust fine, others dislike the feel. If your cat hesitates, try a thinner pellet layer or a mixed top layer for a gradual transition rather than forcing an all-or-nothing swap.
If you want the “less hassle” version
If you’re trying to cut costs but don’t want to experiment for weeks, a realistic middle ground is a budget commercial litter plus a DIY extender like pellets or paper, you still reduce spend, but you keep a texture your cat already trusts.